Running Docker locally on a Windows machine is generally not an issue; unless you’ve committed to using Hyper-V. Since the Docker install for Windows relies on Sun’s Oracle’s Virtual Box, you can’t have both running (Hyper-V and Virtual Box).
There are ways to disable Hyper-V for a boot session (via bcdedit for example – here). However, I’d just like to run in Hyper-V.
Thankfully, Chris Swan has a nice post on getting started, using the Boot2Docker ISO, and setting up the data disk (via a differencing disks) so you can just re-use this config in future Docker instances. You can also see some of the details on the boot2docker requirements for naming of the data disk, username and password for SSH, etc. here:
Basic Steps
Download ISO – from github https://github.com/steeve/boot2docker/releases
Create the VM and just use the ISO for bootup – we’ll add the disk in a moment
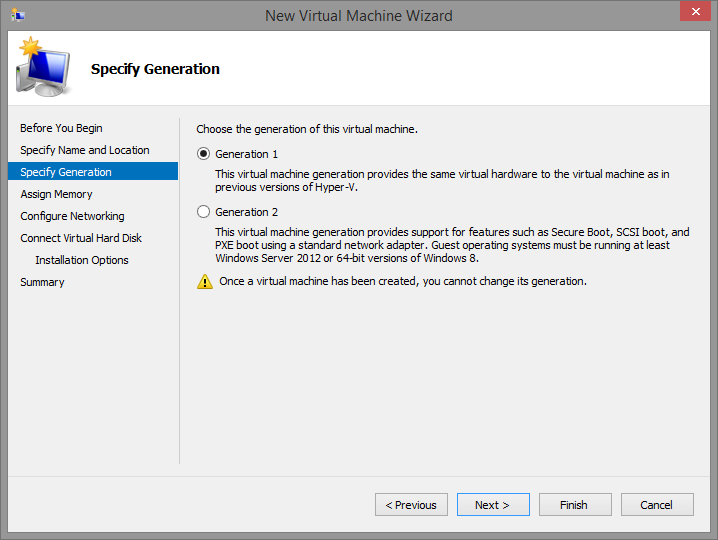
We’ll create the VM as a Generation 1 – we need the legacy adapters etc. as the version of CoreOS used won’t recognize the other adapter types.
Simple Settings:
Memory Size: 1,204 MB
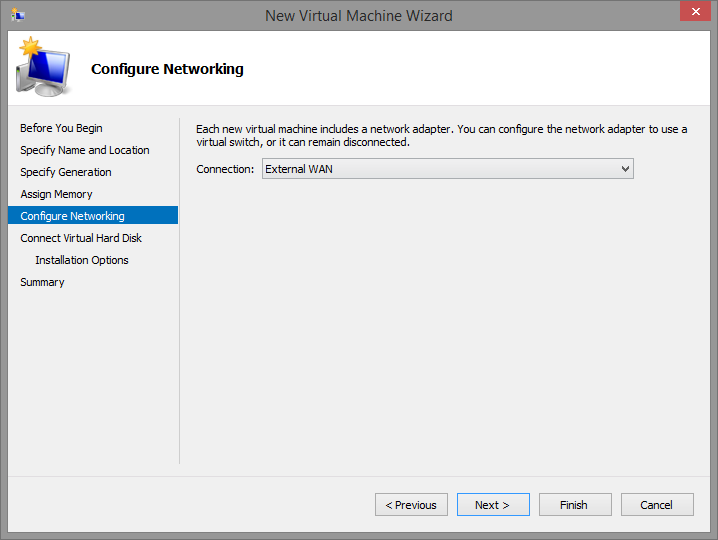
Network Connection: Choose an interface that has Internet access and DHCP assignable addresses for ease:
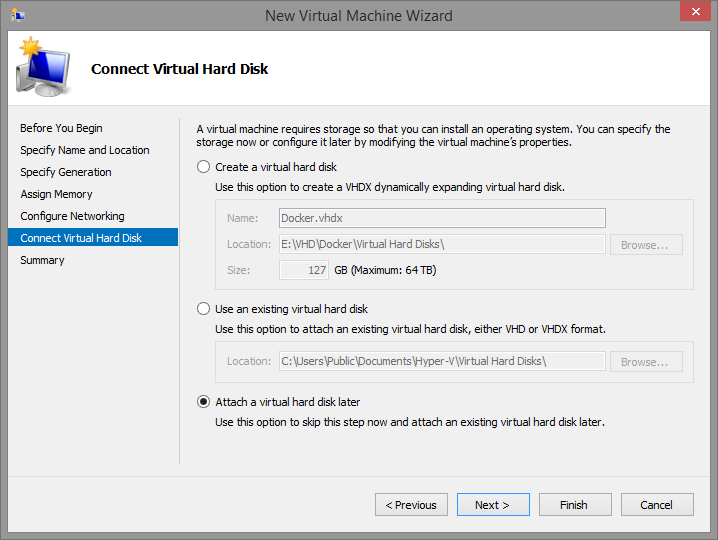
Next, postpone the setup of the Hard Disk as we’re going to setup a differencing disk and we’d like some control over the IDE adapter / Port to use.
Once you’re done with the ‘New Virtual Machine’ Wizard, hop into settings for the VM
Modify the DVD settings to point to the ISO image that you downloaded above:

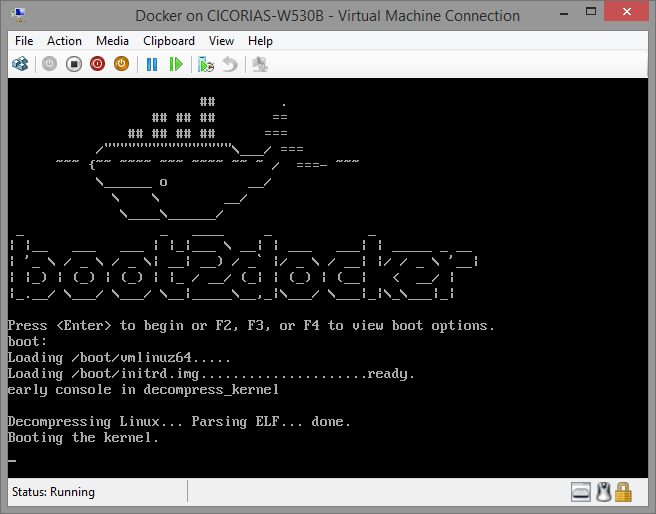
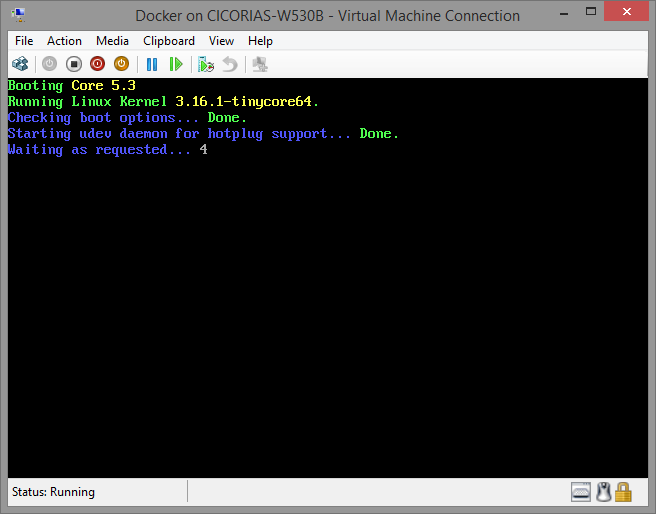
Boot the VM for the First Time
All goes right, you should see in the VM console the ‘bootdocker’ loader information, and eventually the linux prompt
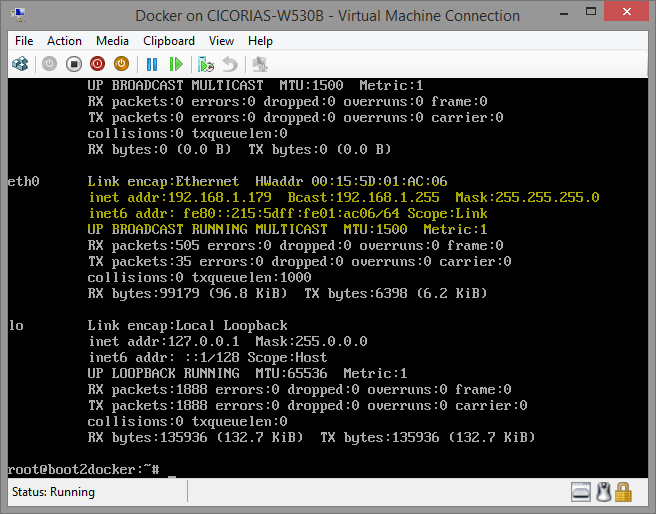
Start a SSH session with your VM (if desired)
To get the IP address of the VM, run ifconfig eth0 to see the default adapter. You should get an address that is hopefully on the Network interface/LAN that you chose. This has to be accessible from your host OS if you want to use SSH – in fact, it also needs access to the internet in order to get to the Docker HUB for downloading images.
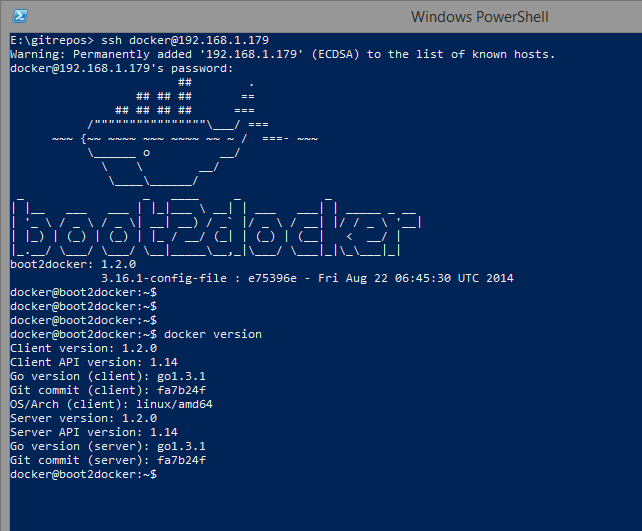
I use “github” Windows tools (which in turn sets up the ‘poshgit’ tools, etc.) so I can just run a SSH session from PowerShell. https://windows.github.com/
Initiate the connection normally with SSH
ssh docker@<IP.address>
Note that the default username / password is : docker / tcuser - see the section on SSH at https://github.com/boot2docker/boot2docker for more information.
Setup the Virtual Disk
Shutdown the VM.
The next step is following what Chris Swan did in his post – which is to setup the VHD – run through the initialization, then make a differencing disk based off of that VHD, then swap out the configuration settings on the VM to use the Differencing disk instead of the base.
Boot the VM again
Once it’s started, choose SSH or the console to perform the disk preparation
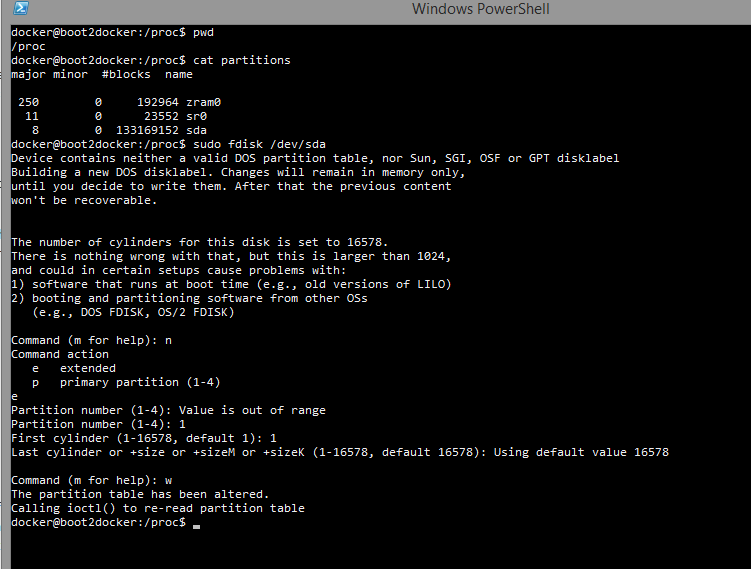
Partition the drive
The steps below are slightly different than Chris’ post – but are:
Dump out the partition table just to be sure
- cat /proc/partions (if you chose IDE 0 / PORT 0 then it should be /dev/sda)
run fdisk
- sudo fdisk /dev/sda
Choose ’extended’
Select partition ‘1’
Choose the defaults for the first and last cylinder
Once that is done, commit with the ‘w’ command
Setup the file system
The naming convention of the disk is also specified on the boot2docker github page – but it has to be ‘boot2docker-data’
Next, format the drive with:
sudo mkfs.ext4 -L boot2docker-data /dev/sda
Note that you will be warned about formatting the entire device, and not a partition. For now, I just went with the above.
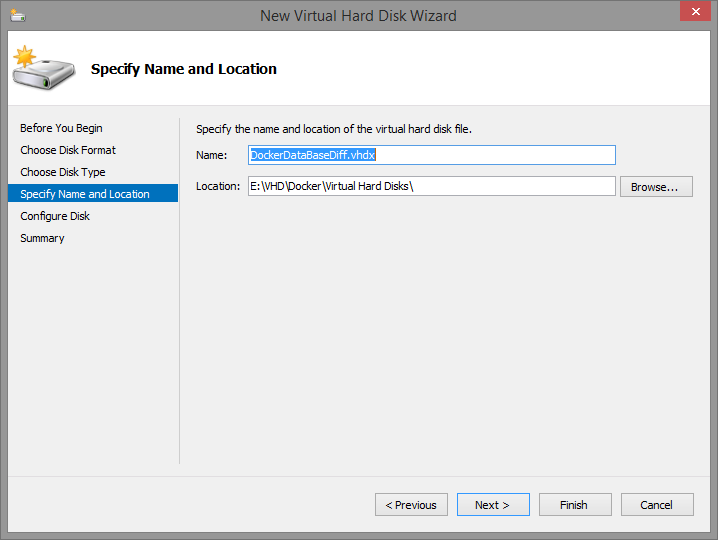
Create the Differencing Disk
Shut down the VM again
Go back into the Virtual Machine Wizard. Select the settings for the VM, then go to the Disk settings and create a “New Virtual Disk”.
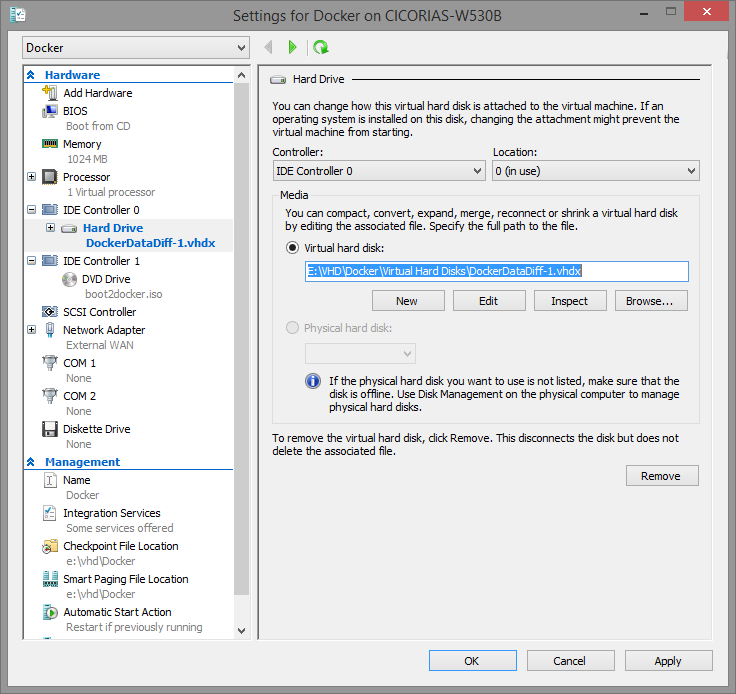
Make sure when prompted, you choose the “base” image you created before, but when you’re done, your “Differencing” disk should be what’s listed in the Hard Disk path for the Controller/Location as below.
Boot the VM – 3rd time
I think it’s the 3rd time – don’t remember at this point…
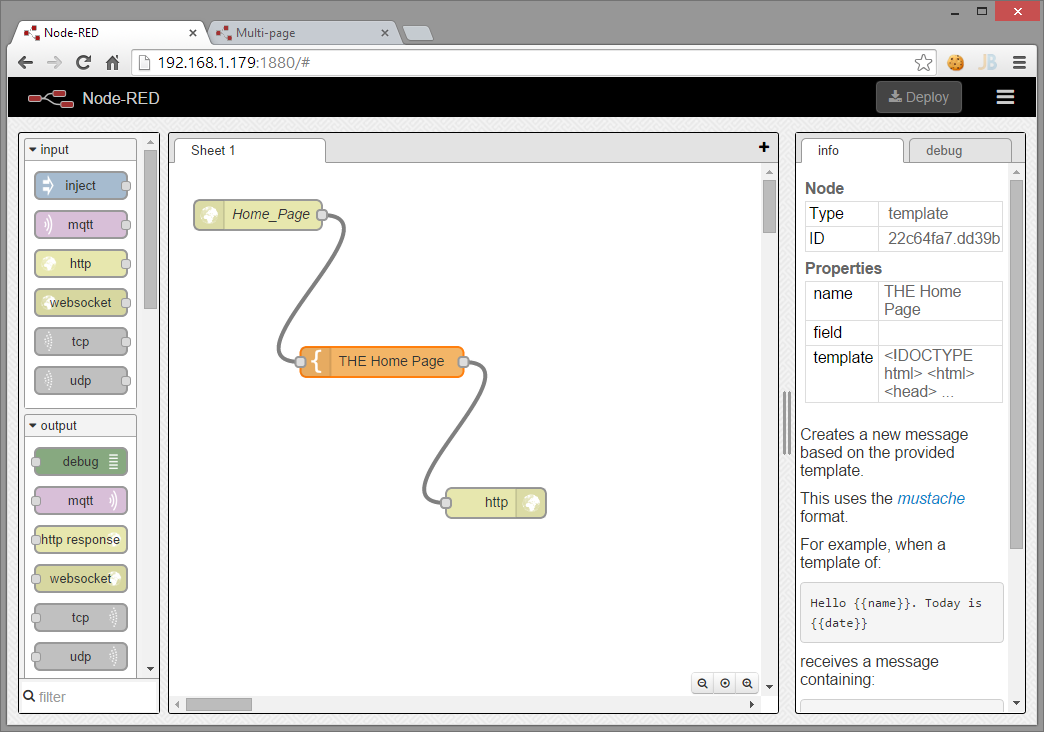
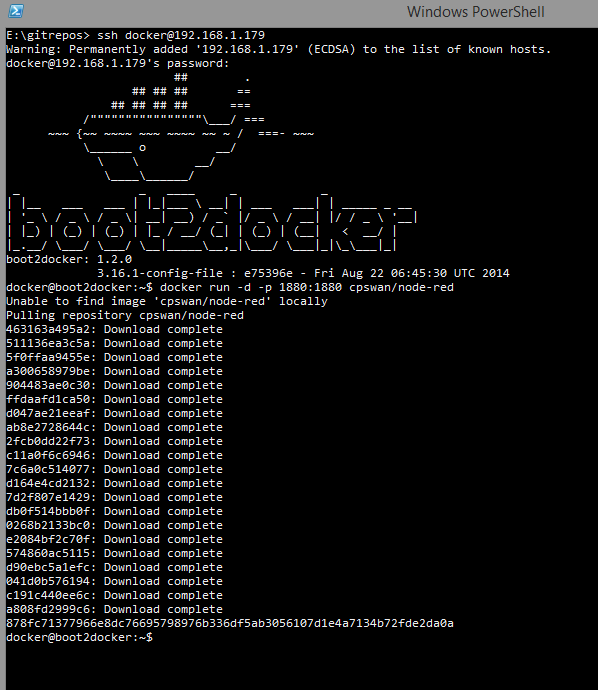
Now we’re ready to “run” something. We’ll use the same image that Chris posted about, just because it’s a cool tool (Node-RED - http://nodered.org/)
Access the image either through the console or via SSH
Do a ‘docker run’ specifying to download the image if needed (-d) as it’s won’t be in the image local library.
docker run –d –p 1880:1880 cpswan/node-red
If all is working, then you should see the image and all it’s dependencies downloading – with the container – and at the end, docker launches the process.
Checkout if the Differencing disk is working
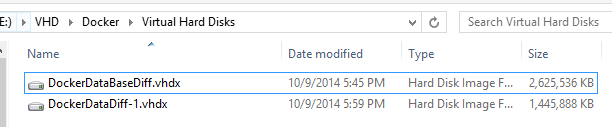
The “before” size

The “after” size – note the increase of the Differencing disl.
Launch the Application
Note that the port mapping is using the same port 1880 (Nat’d).
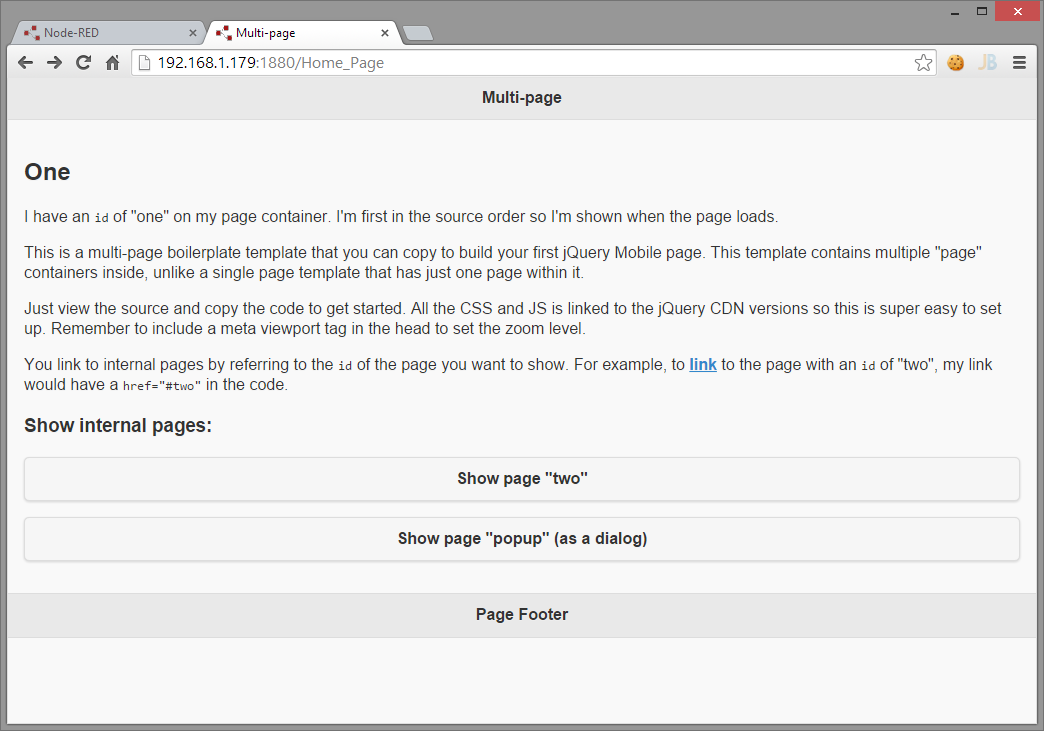
You should get the ‘Node-Red’ home page, which is the designer surface.
I quickly imported a simple “hello world” from the flows http://flows.nodered.org/flow/8069baf59dcb258bb2bd